The client-side encryption nature of Selective Share requires setup work to be done in both the web UI and the CLI tool for a new project. This walk-through shows the steps.
Concepts
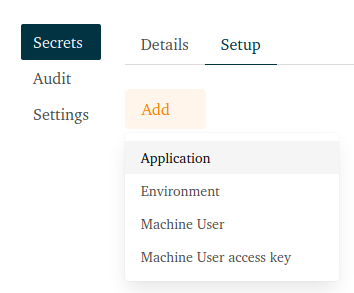
- Application
- The application that will use the secrets.
- Environment
- All the deployment environments / stages a single application passes through
during the development cycle. For example
Dev,QA,Production. - User
- Humans that use Selective Share. Users can have read and write access to secrets depending on the access control settings.
- Machine user
- Programs that need access to secrets they need to run. Machine users can have only read access, depending on the access control settings, and they only have access to a single environment for a single application. There can be multiple machine users on a single server, such as when two different applications share a server.
- Access key
- The credential used by machine users to log into the API. Access keys are secrets. They must be handled as such.
Entity Relationship example
- Web App (application)
- QA (environment)
- QA Server (machine user)
- QA Key (access key)
- QA Server (machine user)
- Production
- Production Server
- Production Key
- Production Server
- QA (environment)
| Secret Name | Environment | |
|---|---|---|
| QA | Production | |
| DBUSER | qauser | prduser |
| DBPWD | qapassword | prdpassword |
Edit interface for entities
| Entity | Interface |
|---|---|
| Application | Web UI |
| Environment | Web UI |
| Machine User | Web UI |
| Access Key | Web UI |
| Secret Name | CLI |
| Secret Value | CLI |
Procedure
Server-side setup
In the web UI, do the following:
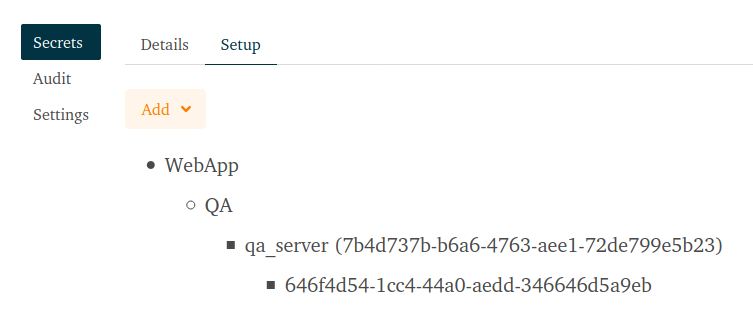
- Create an application, e.g. WebApp
- Create an environment, e.g. QA
- Create a machine user, e.g. qa_server
- Create an access key for the machine user
NB: Save the API key in the message box, this is the secret access key and it is not possible to display it again afterwards. - You should end up with a setup similar to this:
Client-side setup
These steps are performed on your development machine.
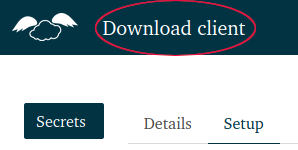
- Download the CLI client from the Download menu
- Extract the executable and install it somewhere in your path.
- Check that the application can be called from anywhere with
sltv -v. It should print the version string. - Initialise your (human) user account and provide the login credentials you
use for logging into the web app.
sltv init -u
This will generate a GPG key pair and upload the public key. - Confirm that everything is working.
sltv check
This should print the following information:Selective Share server: https://app.selectiveshare.com GPG version: 2.2.19 Current directory: /home/YOU/wherever/ Sltv home: /home/YOU/.sltv/ User type: human user
Application server setup
These steps are performed on the application server.
- Install the CLI client in the path.
- Check that the client is accessable from anywhere with
sltv -v. - Set the API credentials
 export SLTV_API_USER=7b4d737b-b6a6-4763-aee1-72de799e5b23
 export SLTV_API_KEY=YOUR API KEY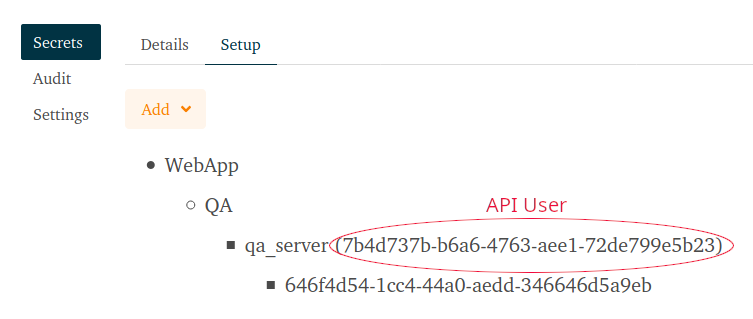
- Go to the working directory of the application that will use the secrets.
- Initialise the machine user’s account.
sltv init -m
This will generate a GPG key pair and upload the public key. - Confirm everything is working.
sltv check
This should print the following information:Selective Share server: https://app.selectiveshare.com GPG version: 2.2.19 Current directory: /home/YOU/webapp/ Sltv home: /home/YOU/webapp/.sltv/ User type: machine user
Generate an environment key
This step is performed on your development machine.
- Create an environment key. It is used to encrypt all the secrets in a
single environment.
sltv gen-key -t env -g -a WebApp -e QA
This will create a symmetric key for the environment, encrypt that key with your and the machine user’s GPG keys and upload the encrypted environment key.
Add a secret
On your development machine, add two secrets
sltv write-secret -a webapp -e qa -n DB_USER -s qauser
sltv write-secret -a webapp -e qa -n DB_PWD -s qapwd
This procedure encrypts the secret and uploads the encrypted secret.
Fetch the secrets
sltv read-secret -a webapp -e qa
This creates a directory sltv-secrets with a .env containing all the secrets.